
Didn't I tell you there would be lots more duct tape projects? I hope you're not getting tired of duct tape, because let me tell ya, it really is addictive. The more you make using duct tape, the more ideas you get for other duct tape projects. Back to school is just around the corner, so if your child needs a new lunch bag, this a great project to make!
I was inspired to make a lunch bag by this duct tape purse that I made last week. I am really proud of this one because I came up with the idea and the instructions 100% by myself. I found lots of cute duct tape patterns on my recent trip to Hobby Lobby, particularly some penguin duct tape that was perfect for a lunch bag.
You will need:
2-3 colors of duct tape
ruler
scissors
pen
stick-on Velcro
Choose one color/pattern for the main color. You will need another color for the inside lining, and then you can either use the same color for the trim or choose a different one.
For these instructions, I will abbreviate each color as such:
Main color: MC
Liner color: LC
Trim color: TC
Start by cutting 6 1/2 inch strips of your MC. Start overlapping them as shown:

Keep overlapping pieces of tape until you have a strip that measures approximately 6 1/2 by 25 inches. Then take your LC and start cutting 6 1/2 strips. Start by laying the first piece about 1/2 inch from the first piece of your MC, sticky sides together. Keep laying pieces of tape on top of the MC piece, overlapping them the same way you did on the other side.

Keep going until you have the piece completely covered, stopping about 1/2 inch from the end. Fold the sticky edges over. Then trim the edges so the piece is 6 inches wide and 24 1/2 inches long.

Next, make the side pieces. *Cut 3 pieces of your MC, 8 inches long and overlap them the same way you did on the main piece. Cut 3 pieces of the LC and overlap them on the other side the same way you did on the main piece.


Trim the piece so that it is 8 inches by 4 inches. Then take a ruler and a pen and make a mark along the top at the 1 inch mark and the 3 inch mark. Using the ruler, trace a diagonal line from the 1 inch mark to the bottom left corner, and then from the 3 inch mark to the bottom right corner. Cut along the 2 lines that you just drew. Then you will have not a triangle, but sort of. I guess technically it's a trapezoid. The bottom of the piece will still be 4 inches but the top will be 2 inches.**

Repeat from * to **.
Now that you have your main piece and the 2 side pieces, all that is left to do is put them all together.
Lay your main piece and side pieces down with the lining side up. Measure 8 inches from the edge of the main piece and make a mark. Do the same on the other side. Then take your side pieces and place them with the bottom edge up against the main piece where the mark is. Tape them down using the LC. (I know my instructions probably sound confusing, but hopefully the picture will show you what I mean.)

Then, what you need to do is tape up the sides of the side pieces to the sides of the main piece. Start by taping the inside. Cut an 8 inch piece of tape in the LC. Fold it in half, sticky sides out. Place it along the edge of the side piece, with the fold along the edge. Fold the edge of the main piece up, pushing it up against the other side of the tape connected to the side piece. Repeat this step on all 4 sides. You may need a helper to hold the bag up while you tape (I did.)
This is my bag with 2 of the sides taped up:
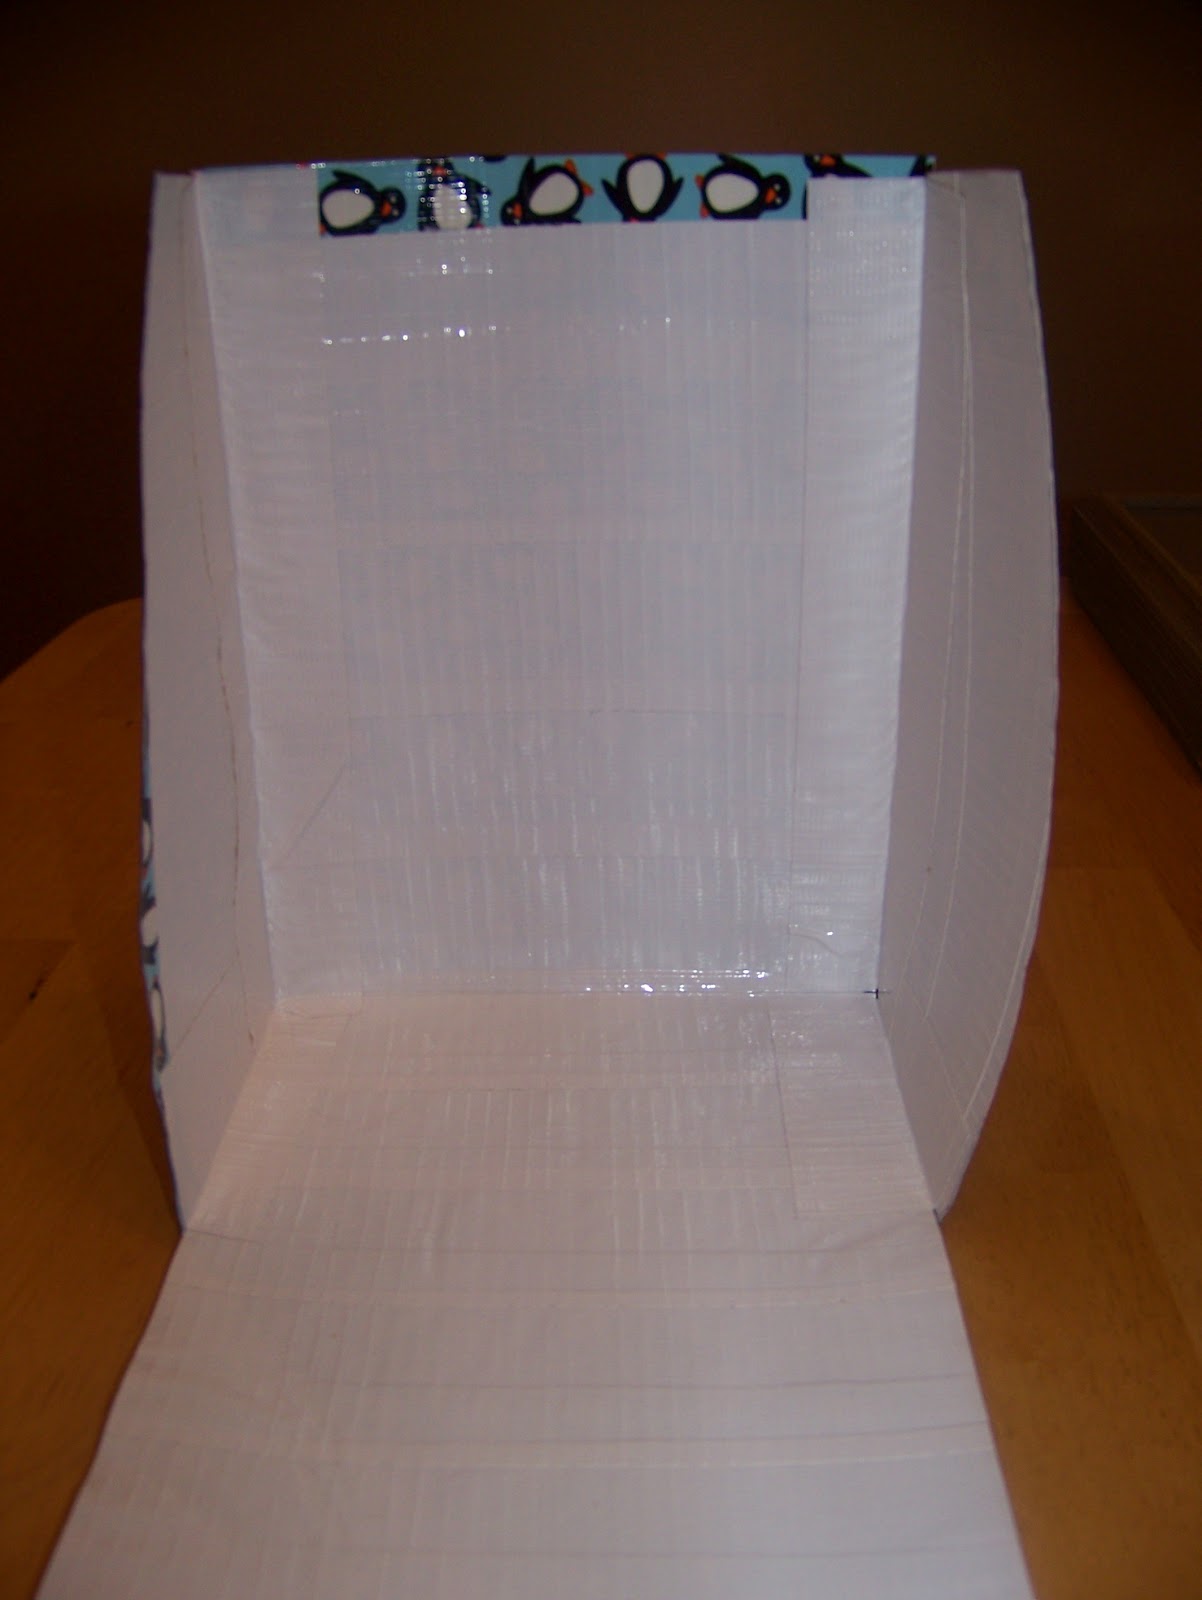
And with all of the sides taped up:
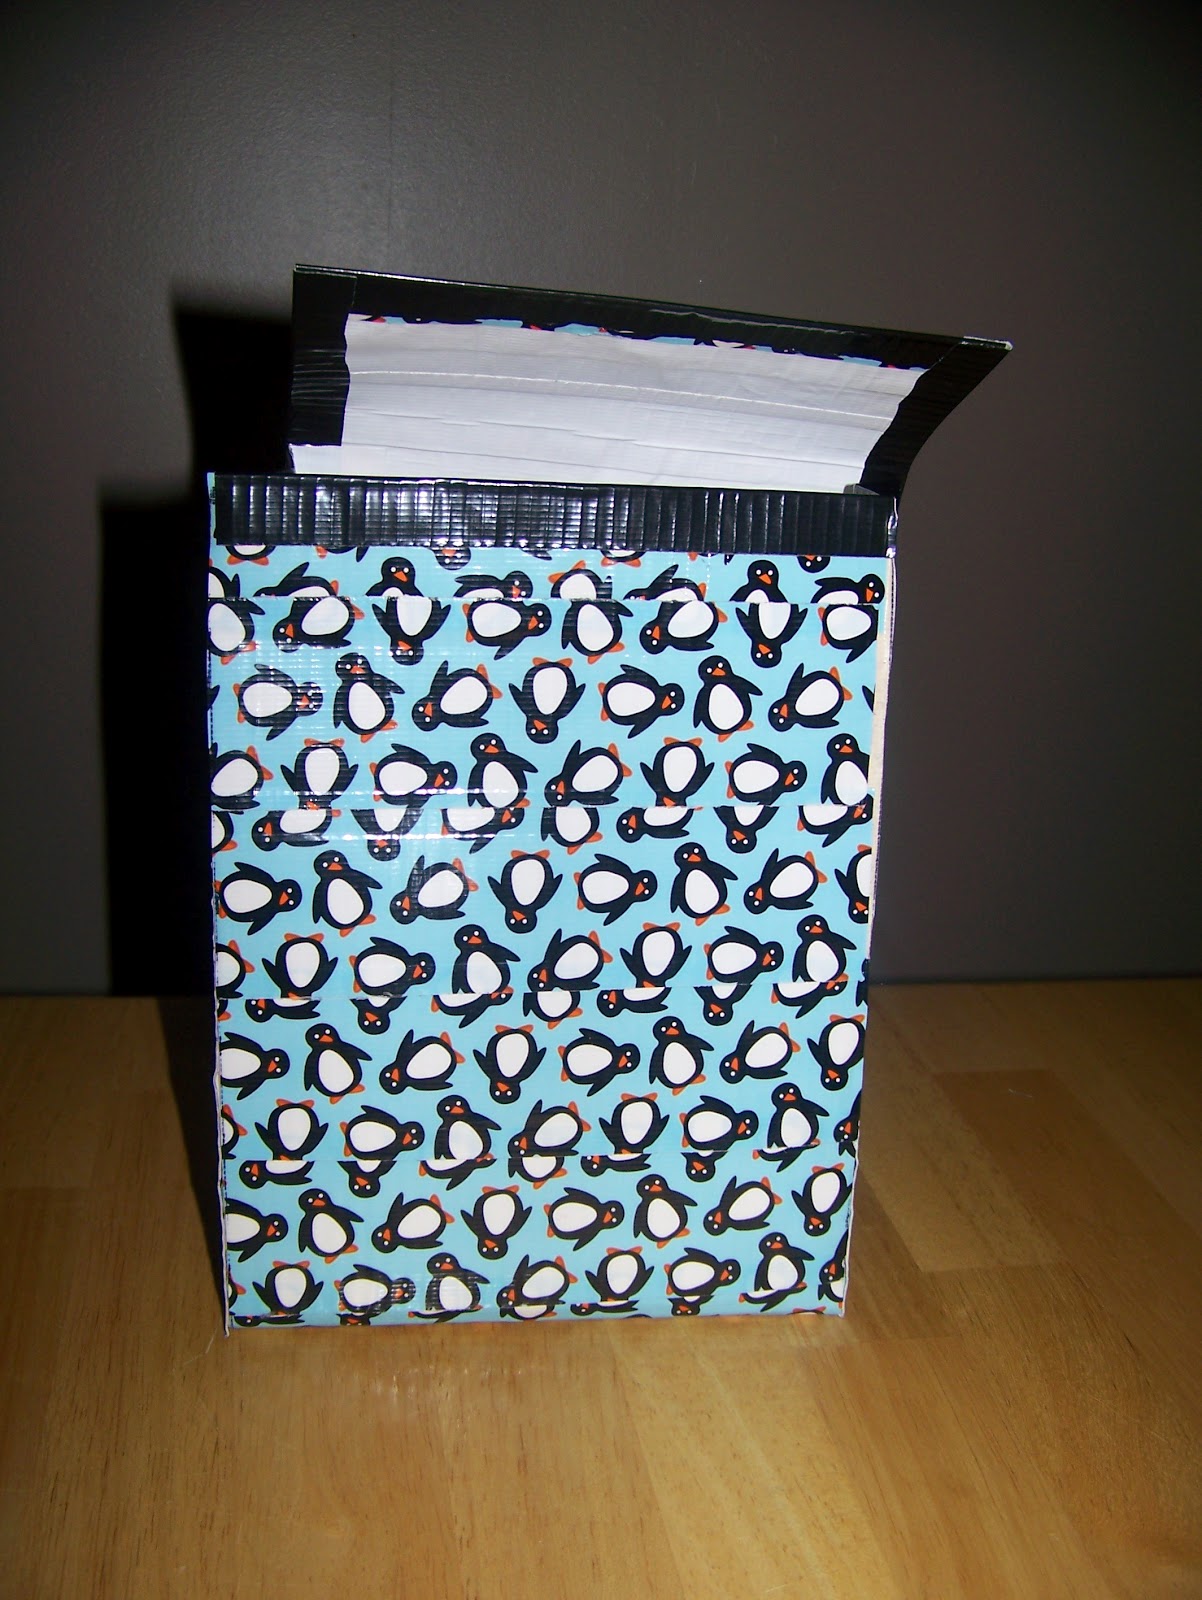
Now you're almost done. Start by cutting 2 8 inch strips of your LC. Cut them in half lengthwise. Use them to tape up the side edges between the main piece and the side pieces. Then cut a 4 inch piece of LC and cut it in half lengthwise to tape up the bottom edges. Cut more strips of the LC as needed and cut in half lengthwise to tape up any remaining edges. Take the stick-on Velcro and place one piece in the middle of the flap, and then put the other piece opposite it on the top middle of the front of the bag.


Ta-da! Now you have a super cute, super durable lunch bag! Your child (or you) will be the envy of the lunchroom!
No comments:
Post a Comment