
I have been working on these for quite awhile. Hopefully that explains the lack of posts in the past couple of weeks, because ladies, this is big. I have created a pattern (yes, I created it myself!) that allows you to easily and inexpensively create your own shoes in any color. I really wish I would have discovered this sooner. I am the kind of person who hates wearing shoes, and in the summer I only wear flip flops. Back before I worked at home and had to work in an office every day that didn't allow flip flops, well, let's just say I wasn't a happy camper. This is a way to kinda sorta get away with wearing flip flops in places that don't allow them. Not to mention these would make great pregnancy shoes for swollen feet! These are lightweight, comfortable shoes that you can easily slip on and off.
Let's get started. You will need:

1 pair of foam flip flops (Old or new... you can get a new pair for $1-2)
Size 5 knitting needles
Stitch holder
Small amount of yarn in cotton or acrylic
Make the tops
This is a beginner level knitting pattern, so if you know how to knit at all, you should be able to make these. And it goes very quickly, too.
(Make 2) Cast on 8 stitches.
Row 1: Purl across
Row 2: Knit one, increase one, knit to the last stitch, increase one, knit one
Repeat rows 1 & 2 until you have 24 stitches.
*Note... if you have wide feet, you may want to increase to 26 or 28 stitches.*
Knit 16 rows in stockinette stitch.
Starting with a right side row, knit 8, loosely cast off 8 (or 10 or 12 if you made them wider), knit 8.
Purl next 8 stitches and put the other 8 on a stitch holder.
Knitting in stockinette stitch, begin decreasing one stitch on the inside edge every row until you have 2 stitches left. Bind off.
Put the remaining 8 stitches on the needle. Join yarn and repeat the same steps as the opposite side.
Weave in loose ends.
Now you should have 2 tops that look something like this:

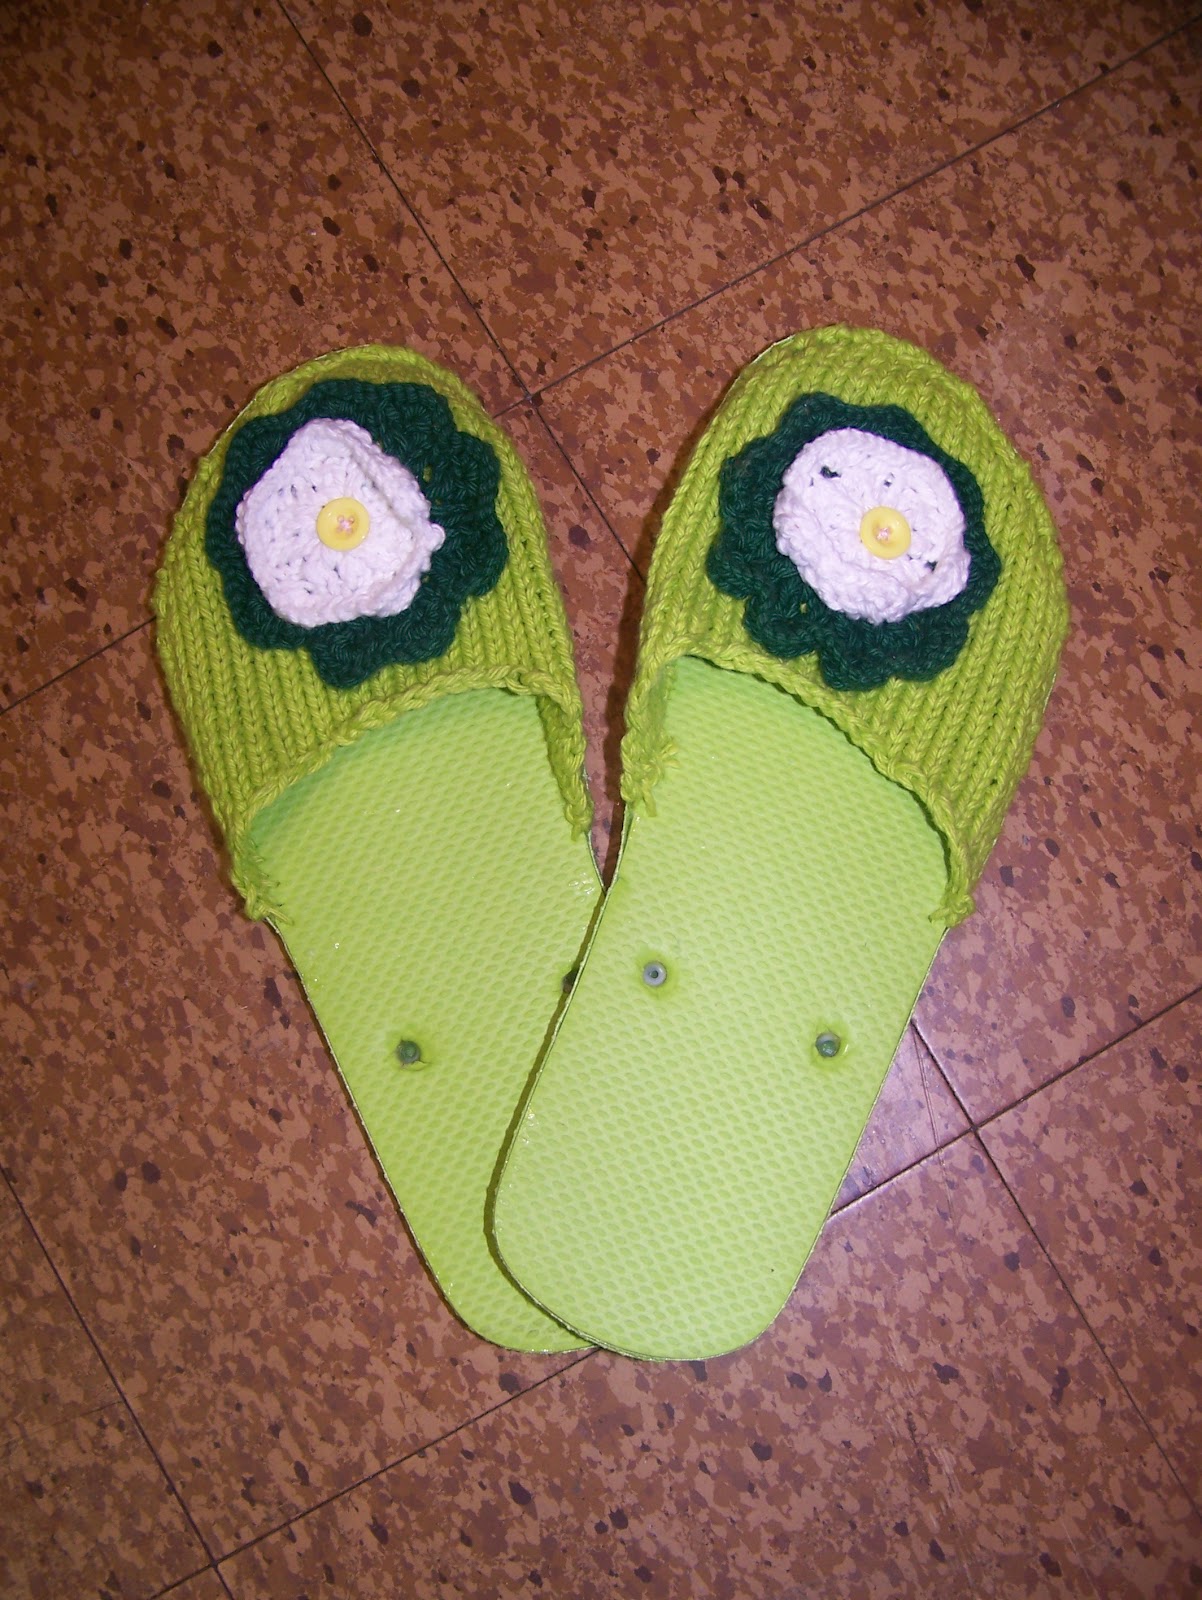
I thought the solid color looked too plain and boring by itself, so I knitted some cute little flowers to decorate them. You can leave them plain, or add whatever embellishments you want... flowers, bows, jewels, etc.
After attaching the flowers, the tops were ready to attach.

Attach the tops
Before you attach the tops, you will need to prepare the flip flops. Cut the tops off at all three points. I saved the little "buttons" that I cut off the bottoms and glued them back in. That way, the holes are plugged up so nothing wet or yucky gets on your feet.
For this step, you will need a good needle. One that is sharp enough to go through foam, but also has an eye that is small enough to go through foam and large enough for yarn to go through. Make sense? I used an upholstery needle.
Thread the needle with a length of yarn. Line the top up with the toe of the flip flop. I found it easiest to start at the toe and sew all the way down to the edge, then start another length of yarn on the other side of the toe and then sew down to the other edge.
You will want to sew down through the knitted top, diagonally through the edge of the flip flop. Make sure not to sew too close to the edge, or else the yarn will rip through the foam.

Don't worry about those ugly-looking stitches on the edges of the shoe. We'll take care of those in the next step.
Sew all the way around until the top is completely attached. Repeat with the second shoe.
Finish it up
Now you're almost done. We still have the problem of the ugly stitches on the edges of the shoe.

See? No one wants that.
You will need some decorative trim, some heavy duty glue, and some straight pins.

Cut a length of trim that will go all the way around the shoe, plus an inch or so. Starting at the back, glue it in place, pinning it as you go.

(It's hard to see in the picture, but there are actually pins holding the trim in place as it dries.)
Make sure to glue the trim down thoroughly, and make sure to cover up the stitches with your trim.
The drying time will vary based on what type of glue you use. Mine were pretty much dry within 15-20 minutes, and completely dry within an hour or two.

Ta-da! No more ugly stitches showing.
And that's about it. Here are just some of the benefits to making these shoes:
- Easy to make
-Quick to make (these were finished within a few hours)
- Versatile (can be made in any color)
-Cheap (it cost me under $3 to make one pair)
- Cute
-Customizable
-Comfortable
-Convenient (slip on, slip off)
I have a feeling I will be making a lot more of these. In fact, I am working on my third pair! Just think about all of those times you had a great outfit but no matching shoes to wear. Problem solved! As long as you leave yourself enough time, you can make shoes to match with anything.
And, if you have a little extra time and yarn, why not make yourself a matching necklace too?
No comments:
Post a Comment