
I promised in my last post that there would be more duct tape crafts. I didn't break my promise! I had so much fun making the purse that I had to make something else. Besides, I needed a wallet to match my purse. These duct tape wallets were even easier than the duct tape purse. Plus, they take less time and materials. All you need is up to 3 colors of duct tape (you can use between 1-3 colors), a ruler, and a good pair of scissors.

Step 1: Make the main fabric
Start by cutting 4 pieces of tape in the same color, about 9 inches long.

Tape them together, overlapping the pieces no more than 1/2 inch. Now you will have one large sticky sheet.

Cut 4 more 9" pieces of tape. Layer them over the top of the sticky sheet. Make sure to start about 1/2" from the beginning of the sheet. The reason for this is because you don't want to have your seams laying on top of each other. It will make the fabric too thick in places.


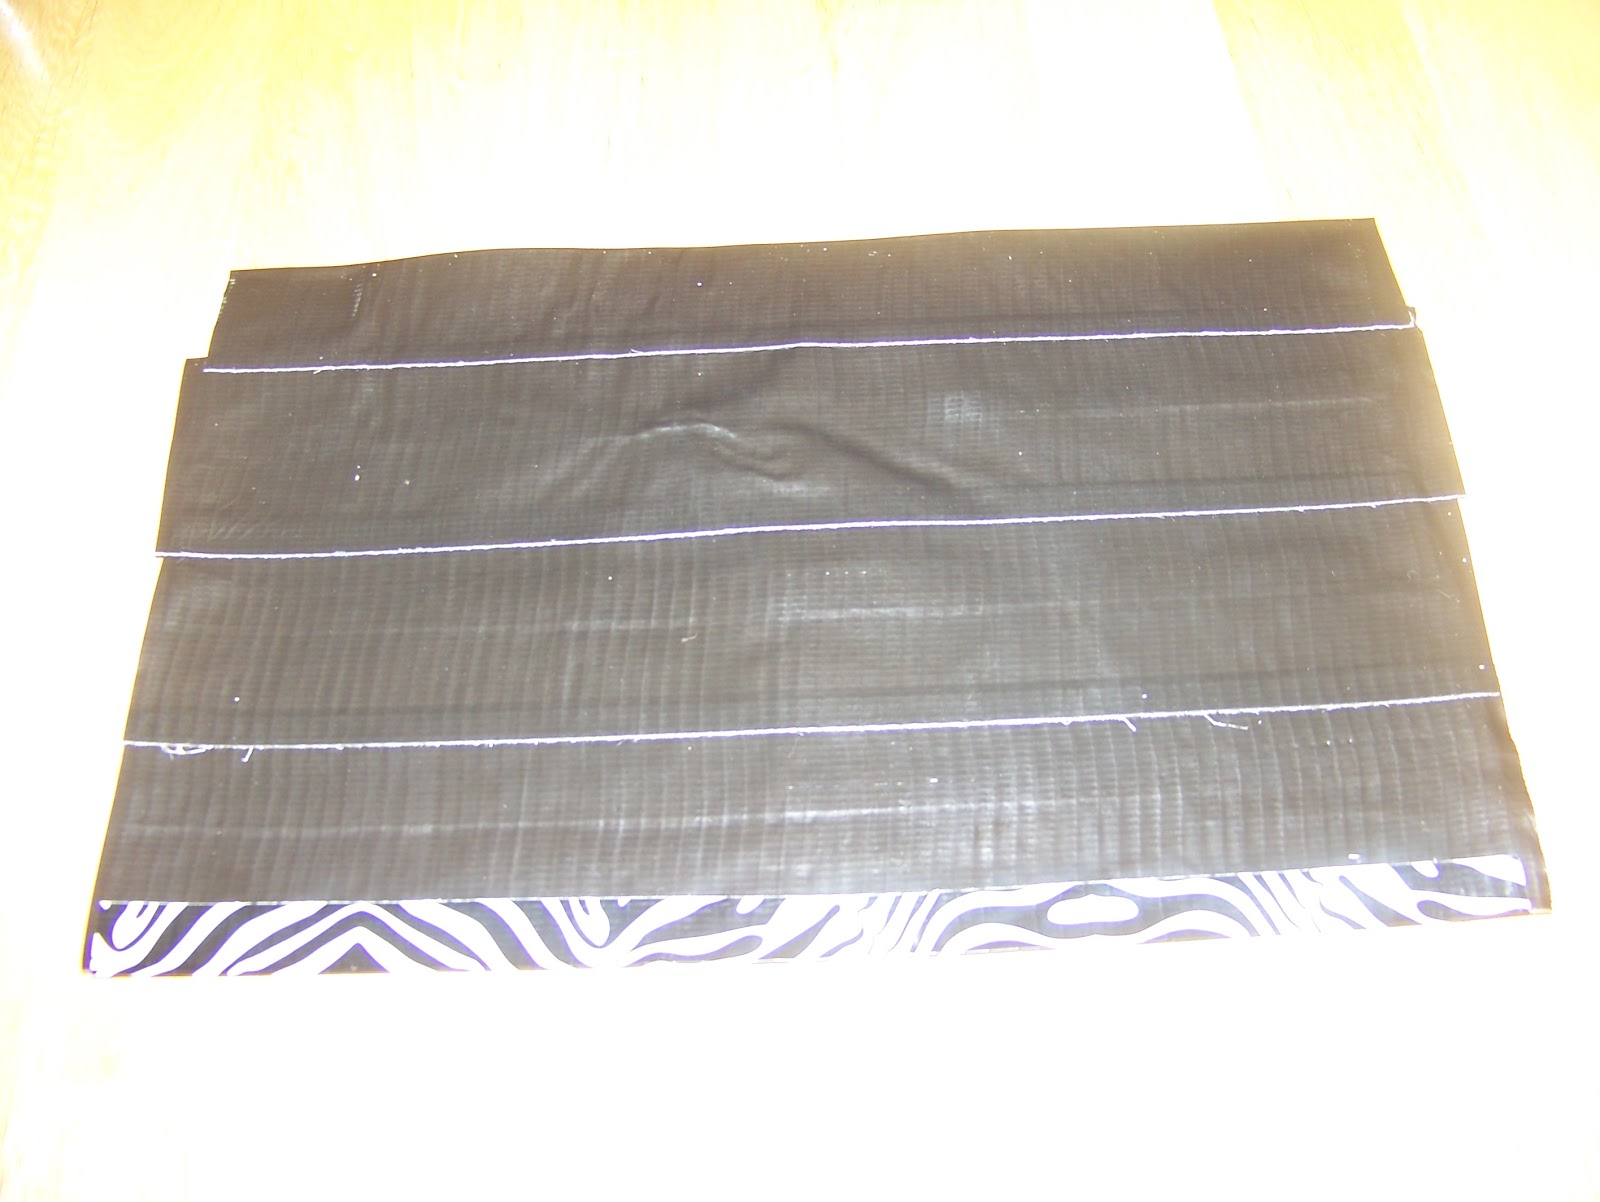
Fold the sticky edges over on both sides. Trim the edges down so the piece is approximately 8 1/2 inches long and 6 inches tall. Set the piece aside.
Step 2: Make the pockets
*Cut 2 pieces of tape approximately 4 1/2 inches long. Tape them together, overlapping about 1/2" like you did with the main fabric in step 1.

Fold the sticky edges over. Then trim the piece so it is 4 inches long and 3 inches tall.

Set the piece aside. Cut 2 pieces of tape, about 9 inches long. Stick them directly on top of each other, sticky sides together. Then cut in half width wise.

Cut another 4" piece of tape and cut in half lengthwise. Use these 2 pieces to cover the top edge of the 2 small pieces you just made, like a trim.

Trim the edges so each of the pieces is 4" long.**
Repeat all of the steps from * to **. You will need to make 2 of everything so that you will have pockets on each side.
Note: If your scissors start to get too sticky and tape-y and do not cut well anymore, run some warm water over them and clean the blades with a magic eraser. That should take all of the sticky goo off of them.
***Take 2 of the small pockets and one of the large pockets. Lay the first small pocket on top of the large pocket, leaving at least 1/2 inch of space at the top.

Put a piece of duct tape over the bottom to hold it in place. Fold the edge of the tape over the bottom.
Place the second pocket on top of the first. Then cut a 4" piece of tape and cut in half lengthwise. ***
Use one half of the tape to tape over the left side edge. This will hold the whole piece together (Do not tape the other side yet)

Repeat from *** to ****. Use the other half of tape to tape over the right side edge. Then you will have 2 pieces that look something like this:

Step 3: Put it all together
Take your main fabric and lay the 2 pocket pieces on the top edge like so.

Cut another 9" piece of tape (whichever color you want to be your trim) and cut in half lengthwise. Take one half and tape the top edges of the pocket pieces to the top edge of the main fabric.


Fold the main fabric in half lengthwise. Cut the second half of the 9" piece of tape in half width wise. Use each of the halves to tape over the sides of the wallet. (At this point, you will want to take a credit card and place it in one of the pockets to make sure you are making them big enough for your credit cards.) This will hold everything together on the sides... the edges of the wallet and the pocket pieces. Trim off the excess.
Take one more 9" piece of tape and cut in half lengthwise. Use one half to cover the top edge of the wallet, and use the other half to tape together the bottom of the wallet. Trim off the excess.


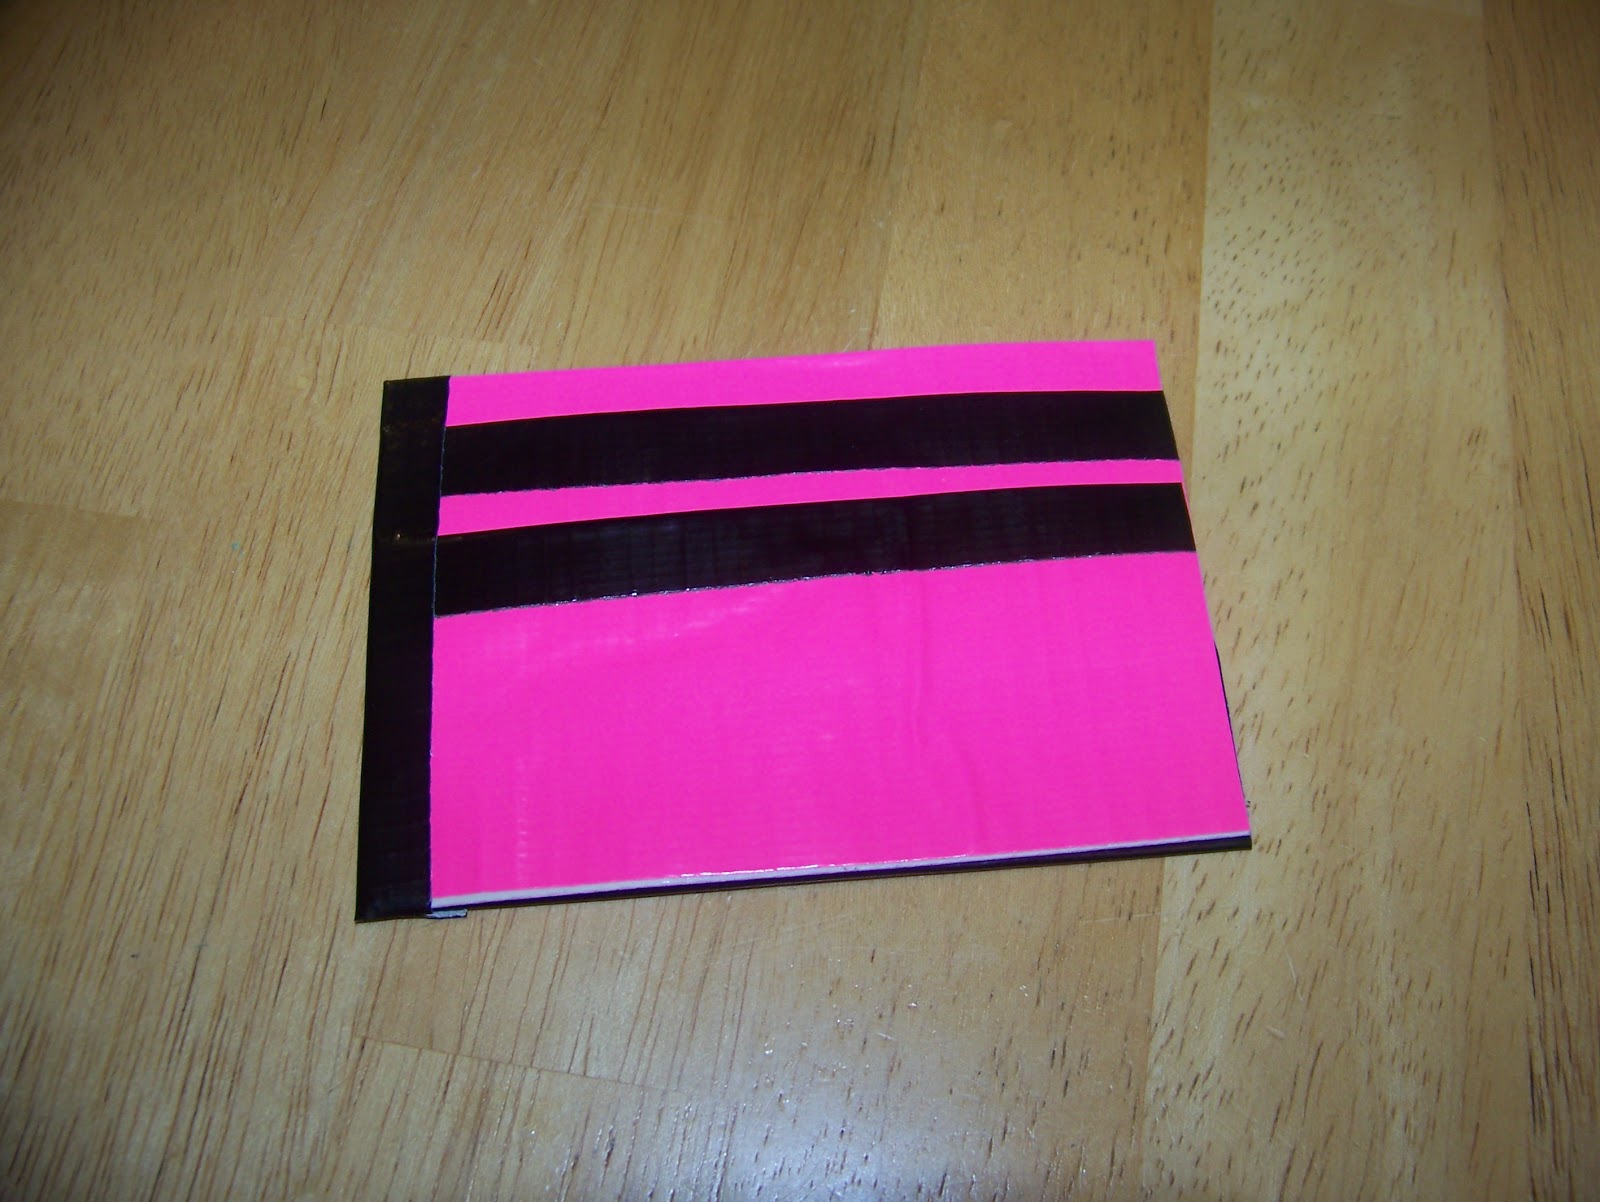
Now your wallet is complete! Fold it in half width wise, and then place a heavy object on top of it (or just sit on it)

The first wallet took me about an hour to make. As much as I love mine, I decided I needed to make another one that was more masculine. So I made one using regular ole' gray duct tape with black trim. This one took me about 30 minutes since I knew what I was doing the second time around.

This is one of those projects I was so excited about, I carried it around with me all day. I love the way these look and feel, plus they're so durable. This is a great project to make for yourself, or with (older) kids, or for a gift. (These are gonna make GREAT stocking stuffers come Christmas time!)
This comment has been removed by the author.
ReplyDeleteSarah.
ReplyDeleteSorry for the test comment. I have typed this whole mess out three times, and lost it each time with Google-password trouble!
Have you ever considered doing this woth chip-bags backed with Duck Tape? I *think* it would go faster and be easier (and be a green project besides), but this is my first project, and I could be totally wrong. I was trying to figure out the chip bag wallet, but being sew-phobic, I decided to look at the duck-tape wallets, as a no-sew project, and then I thought, why not combine the two? Do you think this would work okay?
This comment has been removed by the author.
ReplyDelete