Sunday, February 5, 2012

DIY Toilet Paper Roll Container

I read that a large oatmeal container is the perfect size to hold 2 rolls of toilet paper.  We keep the t.p. packages in our master bathroom, and there's not a lot of room to store it in our hallway bathroom, so I needed somewhere to store extra t.p. rolls in there. 

All you need is an empty large oatmeal container (it has to be a large one, the small ones aren't big enough), fabric or wrapping paper, a rotary cutter and ruler (or scissors if you are using paper), and Mod Podge and a brush.  And, at the last minute I decided I needed some bias tape too.
Wipe the inside of the oatmeal container out with a damp cloth.  Cut your fabric to the right size.  I measured the container as 9 1/4 inches high and 16 inches around.
Brush Mod Podge on the container and glue on the fabric.  I used ducky fabric because that's what my bathroom is decorated in. =)
Once it is completely glued on all the way around, brush on another layer of Mod Podge.  I was going to stop there, but it seemed like it needed something else to finish it off.  So I took some white bias tape and glued it around the bottom.  Now it's done.
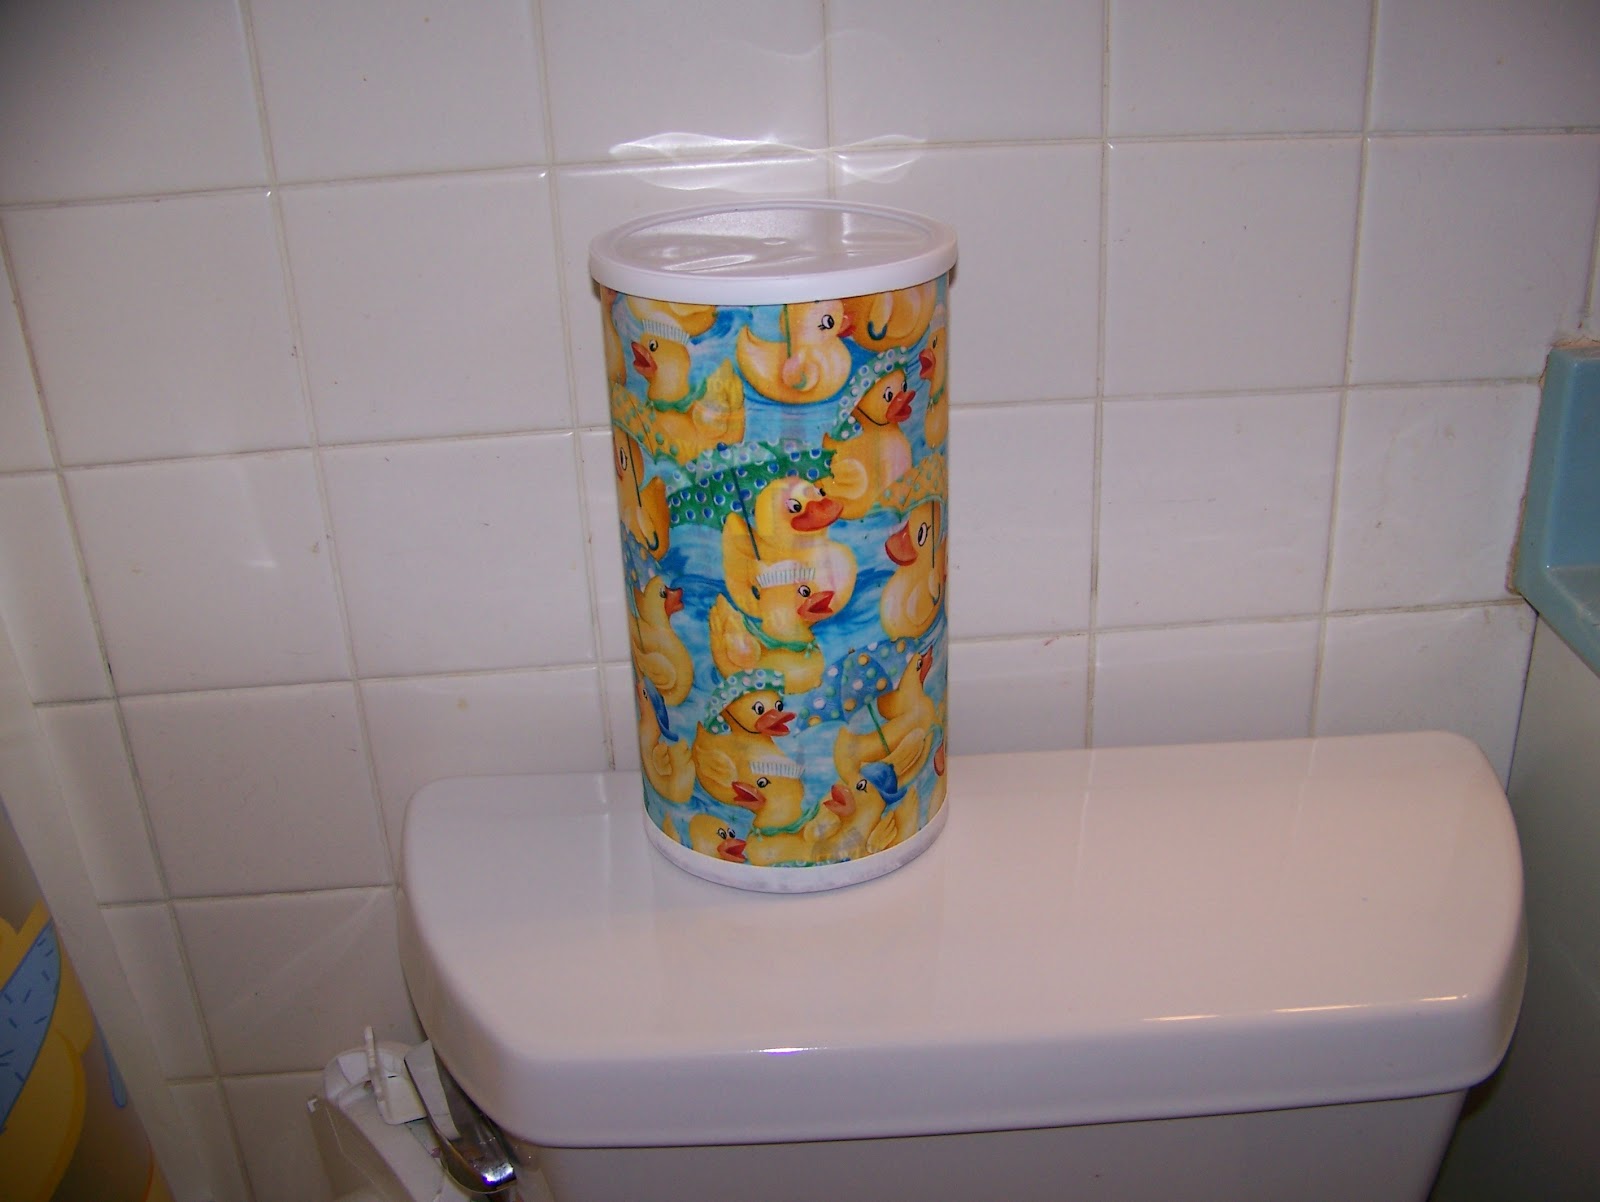
I love it!  It's a cute decorative piece for the bathroom, and it's functional because it keeps extra t.p. handy and easy for guests to find.


Saturday, February 4, 2012

Homemade Cheddar Bay Biscuits

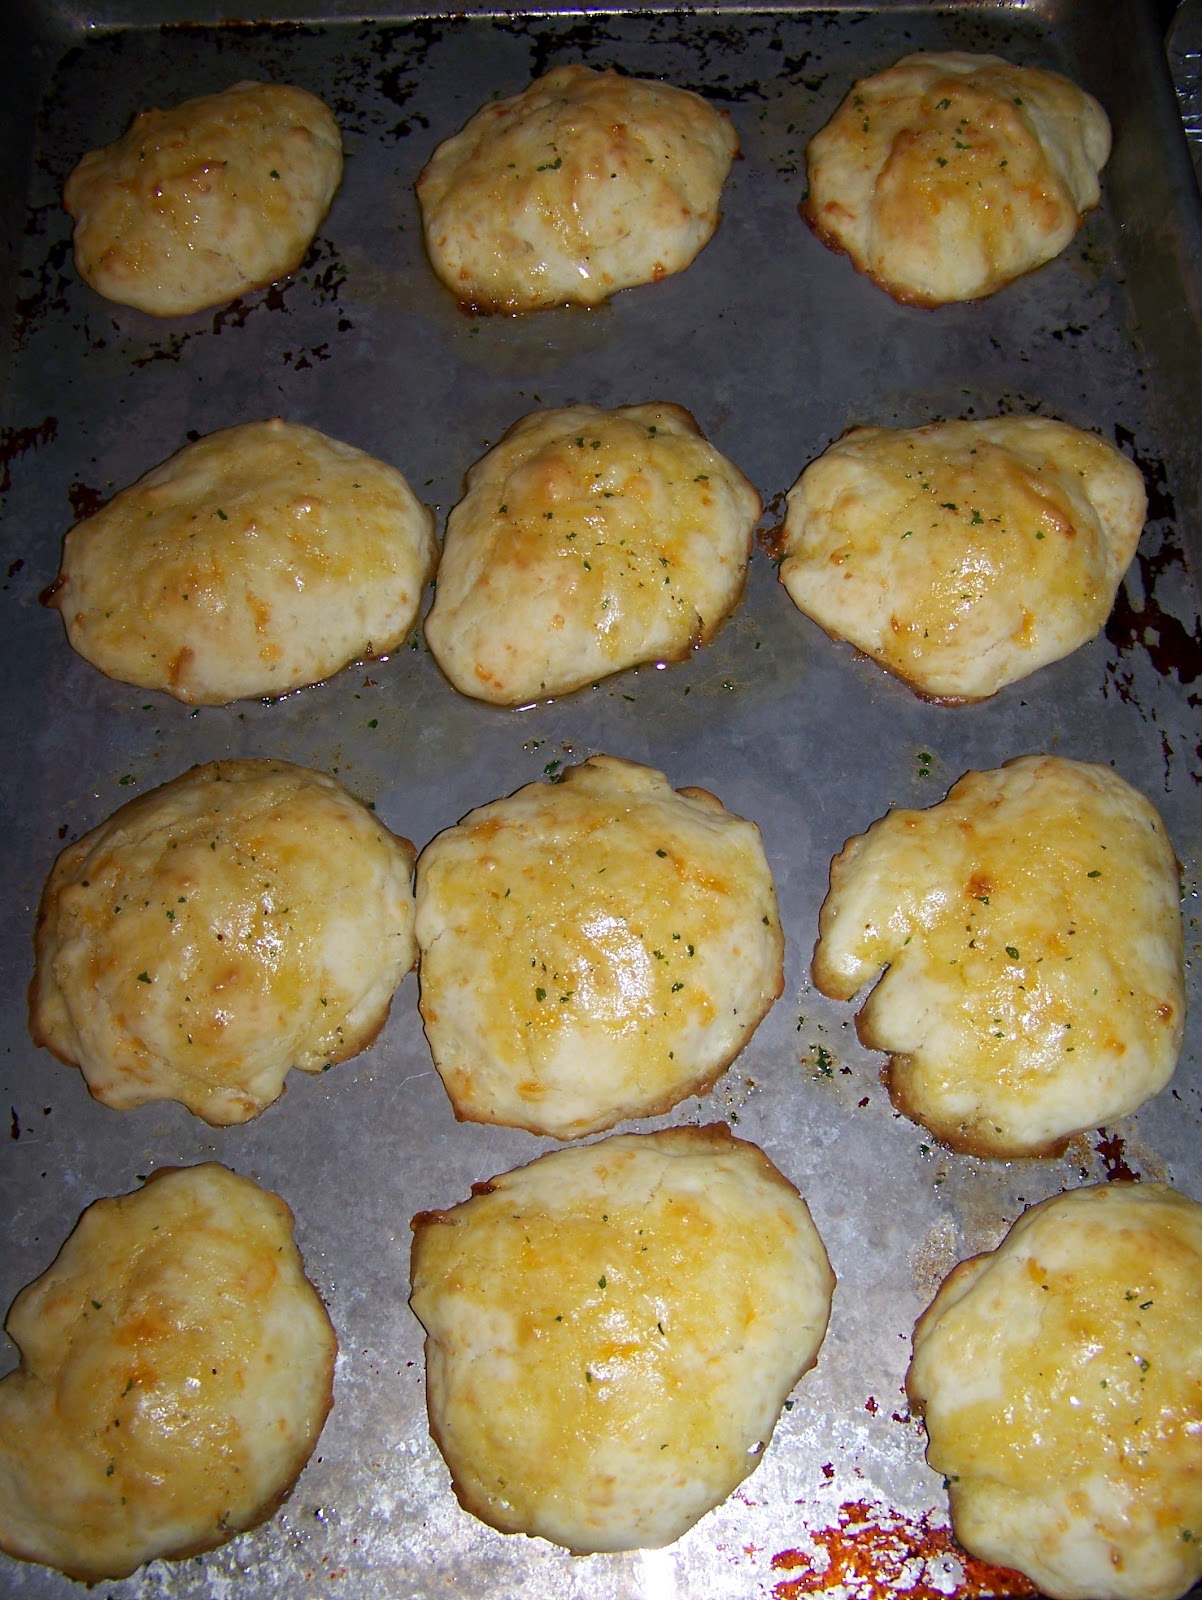
I love the Cheddar Bay biscuits at Red Lobster.  Actually, I just love Red Lobster.  I was never a big seafood fan until I was probably in my early twenties, but a big part of what drew me in was Red Lobster.  I don't know what it is about that place.  It's just a nice environment and good food.  Anyway, I decided to look for a recipe to make your own Cheddar Bay biscuits.  I found one here.  However, I read through some of the comments and one user commented that you need to add some Old Bay seasoning to the garlic butter.  That makes sense, I thought.  So I added some to the recipe and I don't think it would have tasted right without it.  The whole project was surprisingly easier and less time consuming than I expected.

First, preheat the oven to 375 degrees and mix up the batter.

4 cups baking mix
3 ounces cheddar cheese
1 1/3 cups water

Mix with hand mixer or stand mixer until dough is firm.  Line a cookie sheet with parchment paper or spray with cooking spray.  Drop spoonfuls of the dough onto the cookie sheet. 

 Bake for 10-12 minutes.
While you are waiting for the biscuits to cook, mix up the garlic butter:
1 stick of butter, melted
1 tsp garlic powder
1/4 tsp Old Bay Seasoning
1/8 tsp onion powder
1/8 tsp parsley
(I left the salt out.  In case you haven't noticed, I don't add salt to anything, even if a recipe calls for it.)

Once the biscuits are done, take them out of the oven and apply the garlic butter.

The end!  I think they taste pretty close to Red Lobster's.  They have the same taste, but the texture is a little different.  The homemade ones don't have that crispy, crumbly texture that the Red Lobster ones have.  But you can't expect to replicate the awesomeness that is Red Lobster.  All in all I was happy with the biscuits I made.  They were very much appreciated at my house, and they disappeared quickly!

Low-Carb Super Bowl Menu


You can still have a delicious selection of snacks on the table on Super Bowl Sunday even if you are eating low carb.  Here is my menu for game day tomorrow:


Peanuts

Carrots and Ranch Dressing Dip

In reality, I will probably allow myself a few Fritos with the Skyline Dip.  The tradition in our house is to eat Skyline Dip for dinner and watch The Puppy Bowl on Animal Planet during commercial breaks.  I also watch it during the game if I don't have an interest in either one of the teams who are playing.  This is one of those years.  I figure if I don't care about either team in the game, then that's 4 hours of my life that I could spend doing something else.  I am way too busy to waste 4 hours watching a game I could care less about!

Friday, February 3, 2012

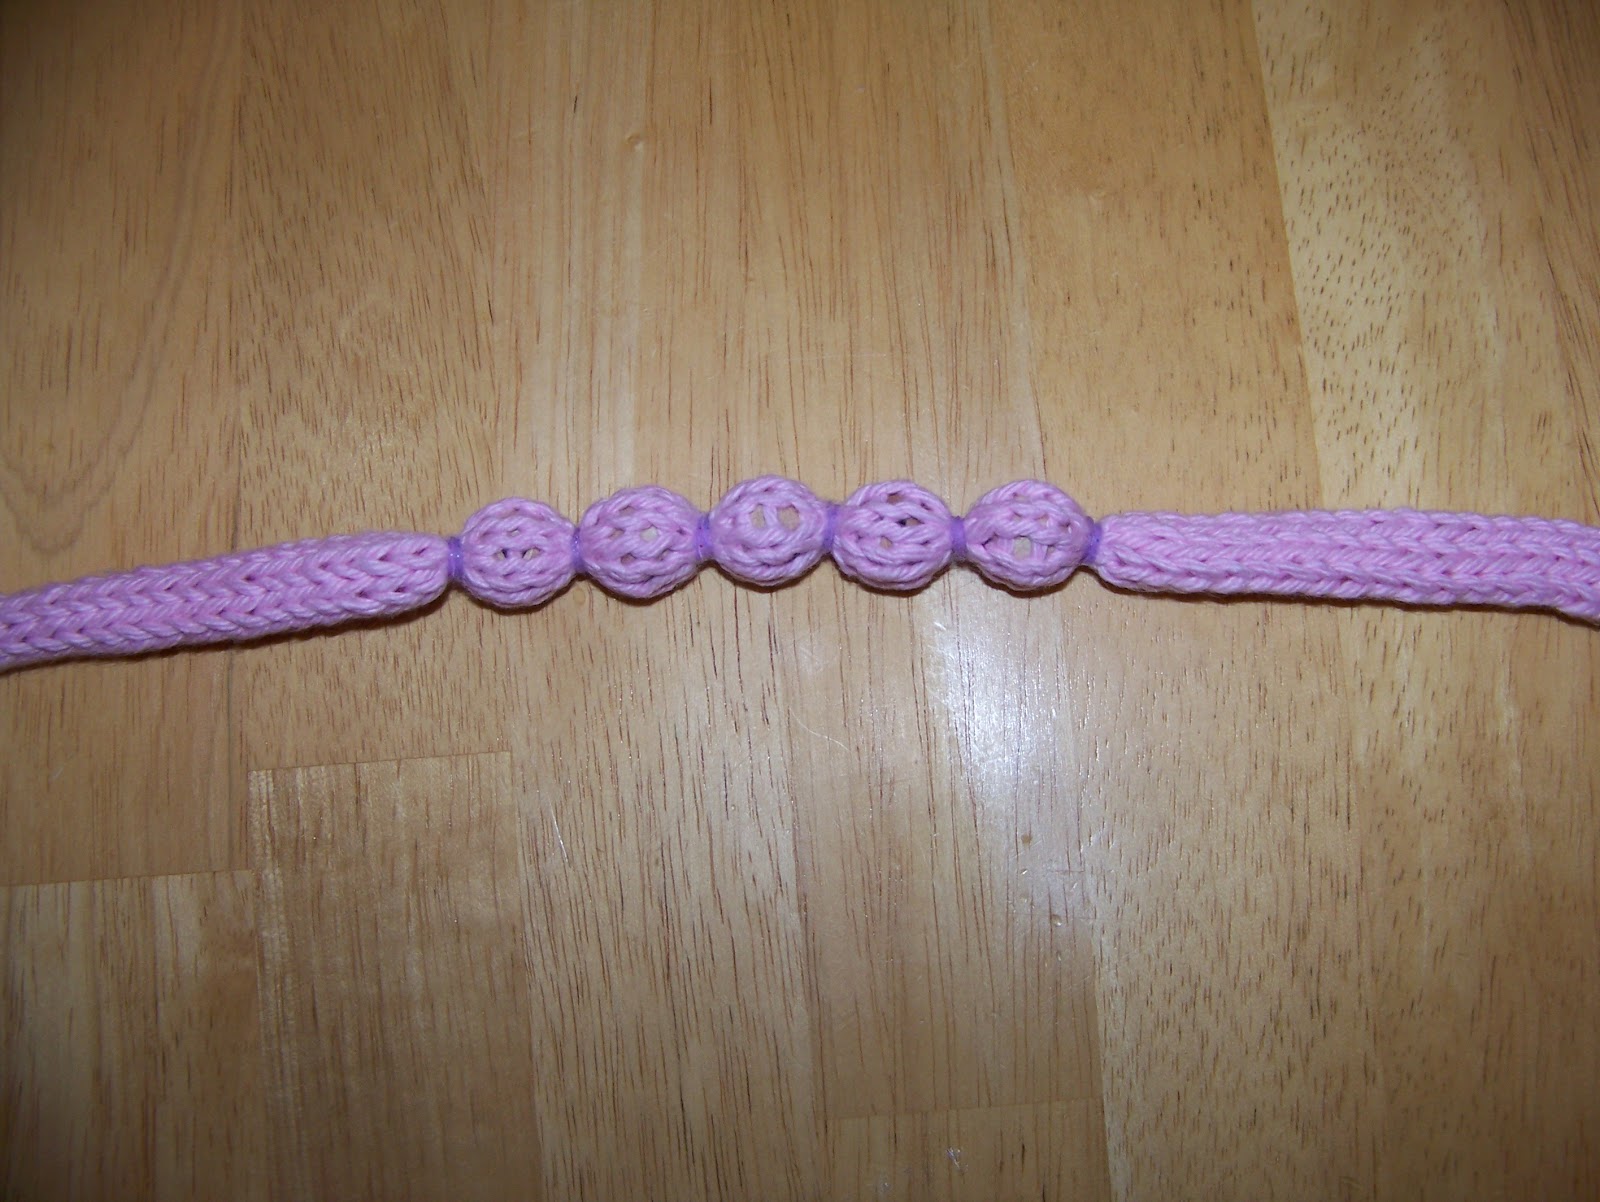
Knitted Bead Necklace


I came up with the idea for this necklace all by myself. I am not even sure what inspired me to come up with it. So this is a completely original idea from me.
I had some wooden beads lying around that I was going to use for another project that never panned out. I was thinking about what to do with those beads, and the idea for this necklace just popped into my head. What you will need is a small amount of yarn (I used cotton, but acrylic should work too), matching thread, size 8 dpns (double pointed needles), 1/2 inch wooden beads, small rubber bands, and a necklace clasp.
Using the yarn and dpns, cast on 6 stitches. Distribute 3 stitches each onto 2 needles. Knit in the round until the tube reaches the desired length. I made mine 20 inches long, but since this project involves some gathering, it was 18 ½ inches when finished. So keep in mind that it will be a little shorter once you are done.
Once the tube is the desired length, bind off all 6 stitches. Weave in the ends. Then take your first bead and push it into the tube. Find the middle of the tube and push the bead all the way to the center. Then secure one small rubber band on each side of the bead.

Keep adding beads, one on each side, and securing them in place with rubber bands. Keep going until you reach the end of the tube, or until you run out of beads.
Sew up the ends of the tubes with matching thread, and sew on a clasp. You’re done!
I was pretty proud of myself for coming up with this idea. It’s pretty easy and inexpensive, depending on what materials you already have. I happened to have all the materials on hand, so this cost me nothing! I made mine in my favorite color, pink, but I think I might make a few more in other colors.
Here I am modeling my new necklace:

Thursday, February 2, 2012

Money Organizing Envelopes

We started doing the Dave Ramsey Total Money Makeover in August 2010.  For those of you not familiar with the Total Money Makeover, it's basically a system to carefully budget your money and save for what you need while paying off your debt.  Although we were carefully saving money for unexpected expenses, we did not have nearly enough saved to cover the medical expenses incurred by our miscarriage in June 2011.  At that point, we didn't know what else to do except quit doing the plan while we figured out our finances and got back on our feet.  Well, it took awhile, and then Christmas rolled around, and we never got back on the plan.  Right around Christmas we paid off our car, and that reminded me that we needed to get back on our budget.  I pulled out our old, dirty, worn out paper envelopes and immediately I wanted something nicer.  I thought about making my own, but I didn't want to put that much time and effort into it.  Luckily, I found these binder pouches on clearance at Walmart.
The front of the pouches do have see-through windows.  I didn't really want to leave them as see-through windows since there is going to be money in them.  Okay, maybe it is obvious that there is money in them because of how they are labeled... but still, it just doesn't seem very modest to be showing off your money.  I like to leave some things to the imagination. ;)  So I took the cardboard that was inside the pouches, turned it around, and wrote what each was for on the opposite side with a marker.
I had some of these binder rings on hand.  I used them to hook all of my envelopes together.


Pretty easy.  Now I have something nice and sturdy in which to organize my money.


Crayon Container out of Wipes Tub

I had an empty Cottonelle wipes tub that I knew I could find a use for. So I ran it through the dishwasher and left it alone for a while, trying to think of a use for it. It didn’t take me long to come up with the idea of using it as a crayon container.


I cut out the rubbery stuff in the center close to the edges. Then I found some letter stickers in my sticker stash and spelled out “crayons” on the top. It is the perfect size for a box or two of crayons and it makes it a lot easier for little ones to get them out and put them away by themselves. I always thought that the boxes that crayons come in are a little tedious. You have to pack them in like sardines, and you can’t really expect little kids to have the patience to put them away. Sure, you could also use a cheap plastic tupperware container, but it doesn’t have the cool easy-access flip-top lid (Angie has fun playing with that too) and it’s not as pretty. As you can see, Angie added some decorations to her new crayon box!

Wednesday, February 1, 2012

Weight Loss Wednesday: Make-Ahead Fruit Smoothies

I love drinking fruit smoothies after a workout.  It's a sweet but healthy treat that helps restore your energy.  But I hate getting out the blender and all of the ingredients every day just to make one.  After a workout I am usually pretty tired and don't feel like doing a lot of work to make a snack, so sometimes I will either skip it, or even worse, sometimes I will grab something else quick to eat that isn't very good for me.  So I decided to make several of them at a time and store them in the fridge so they were ready for me when I was done. 
I bought a package of 12 oz mason jars with lids.  If you don't want to spend money on the jars, you could use something else that you have on hand.  You could even save old jars with screw-on lids, like peanut butter or mayonnaise jars, and wash and reuse them.  You obviously can use whatever you want, but I make mine with one container of Carbmaster yogurt, 1/2 cup of almond milk, and 1/4 cup of sliced strawberries.  It comes to a total of 90 calories and 7.4 carbs.
Throw all the ingredients in the blender.  I can make 3 at a time in my blender.  Then pour into the jars and screw on the lids.  BTW, I read somewhere that you can attach a mason jar directly to your blender.  I have not been able to figure this out, since the pitcher part doesn't come off.  Oh well, maybe it just doesn't work on my blender. 
Anyway, that's all there is to it.  Refrigerate the jars and then grab one when you finish a workout or need a quick healthy snack. 
One other thing I wanted to mention, you can use the lids from Parmesan cheese containers instead of the metal lids.  I prefer not to use the metal ones because they are hard to wash and they rust.  Mason jars are a standard size, so check other jars to see if those lids fit too.  I found a peanut butter jar lid that fits, and I'm sure there are other condiment lids that are the same size.